
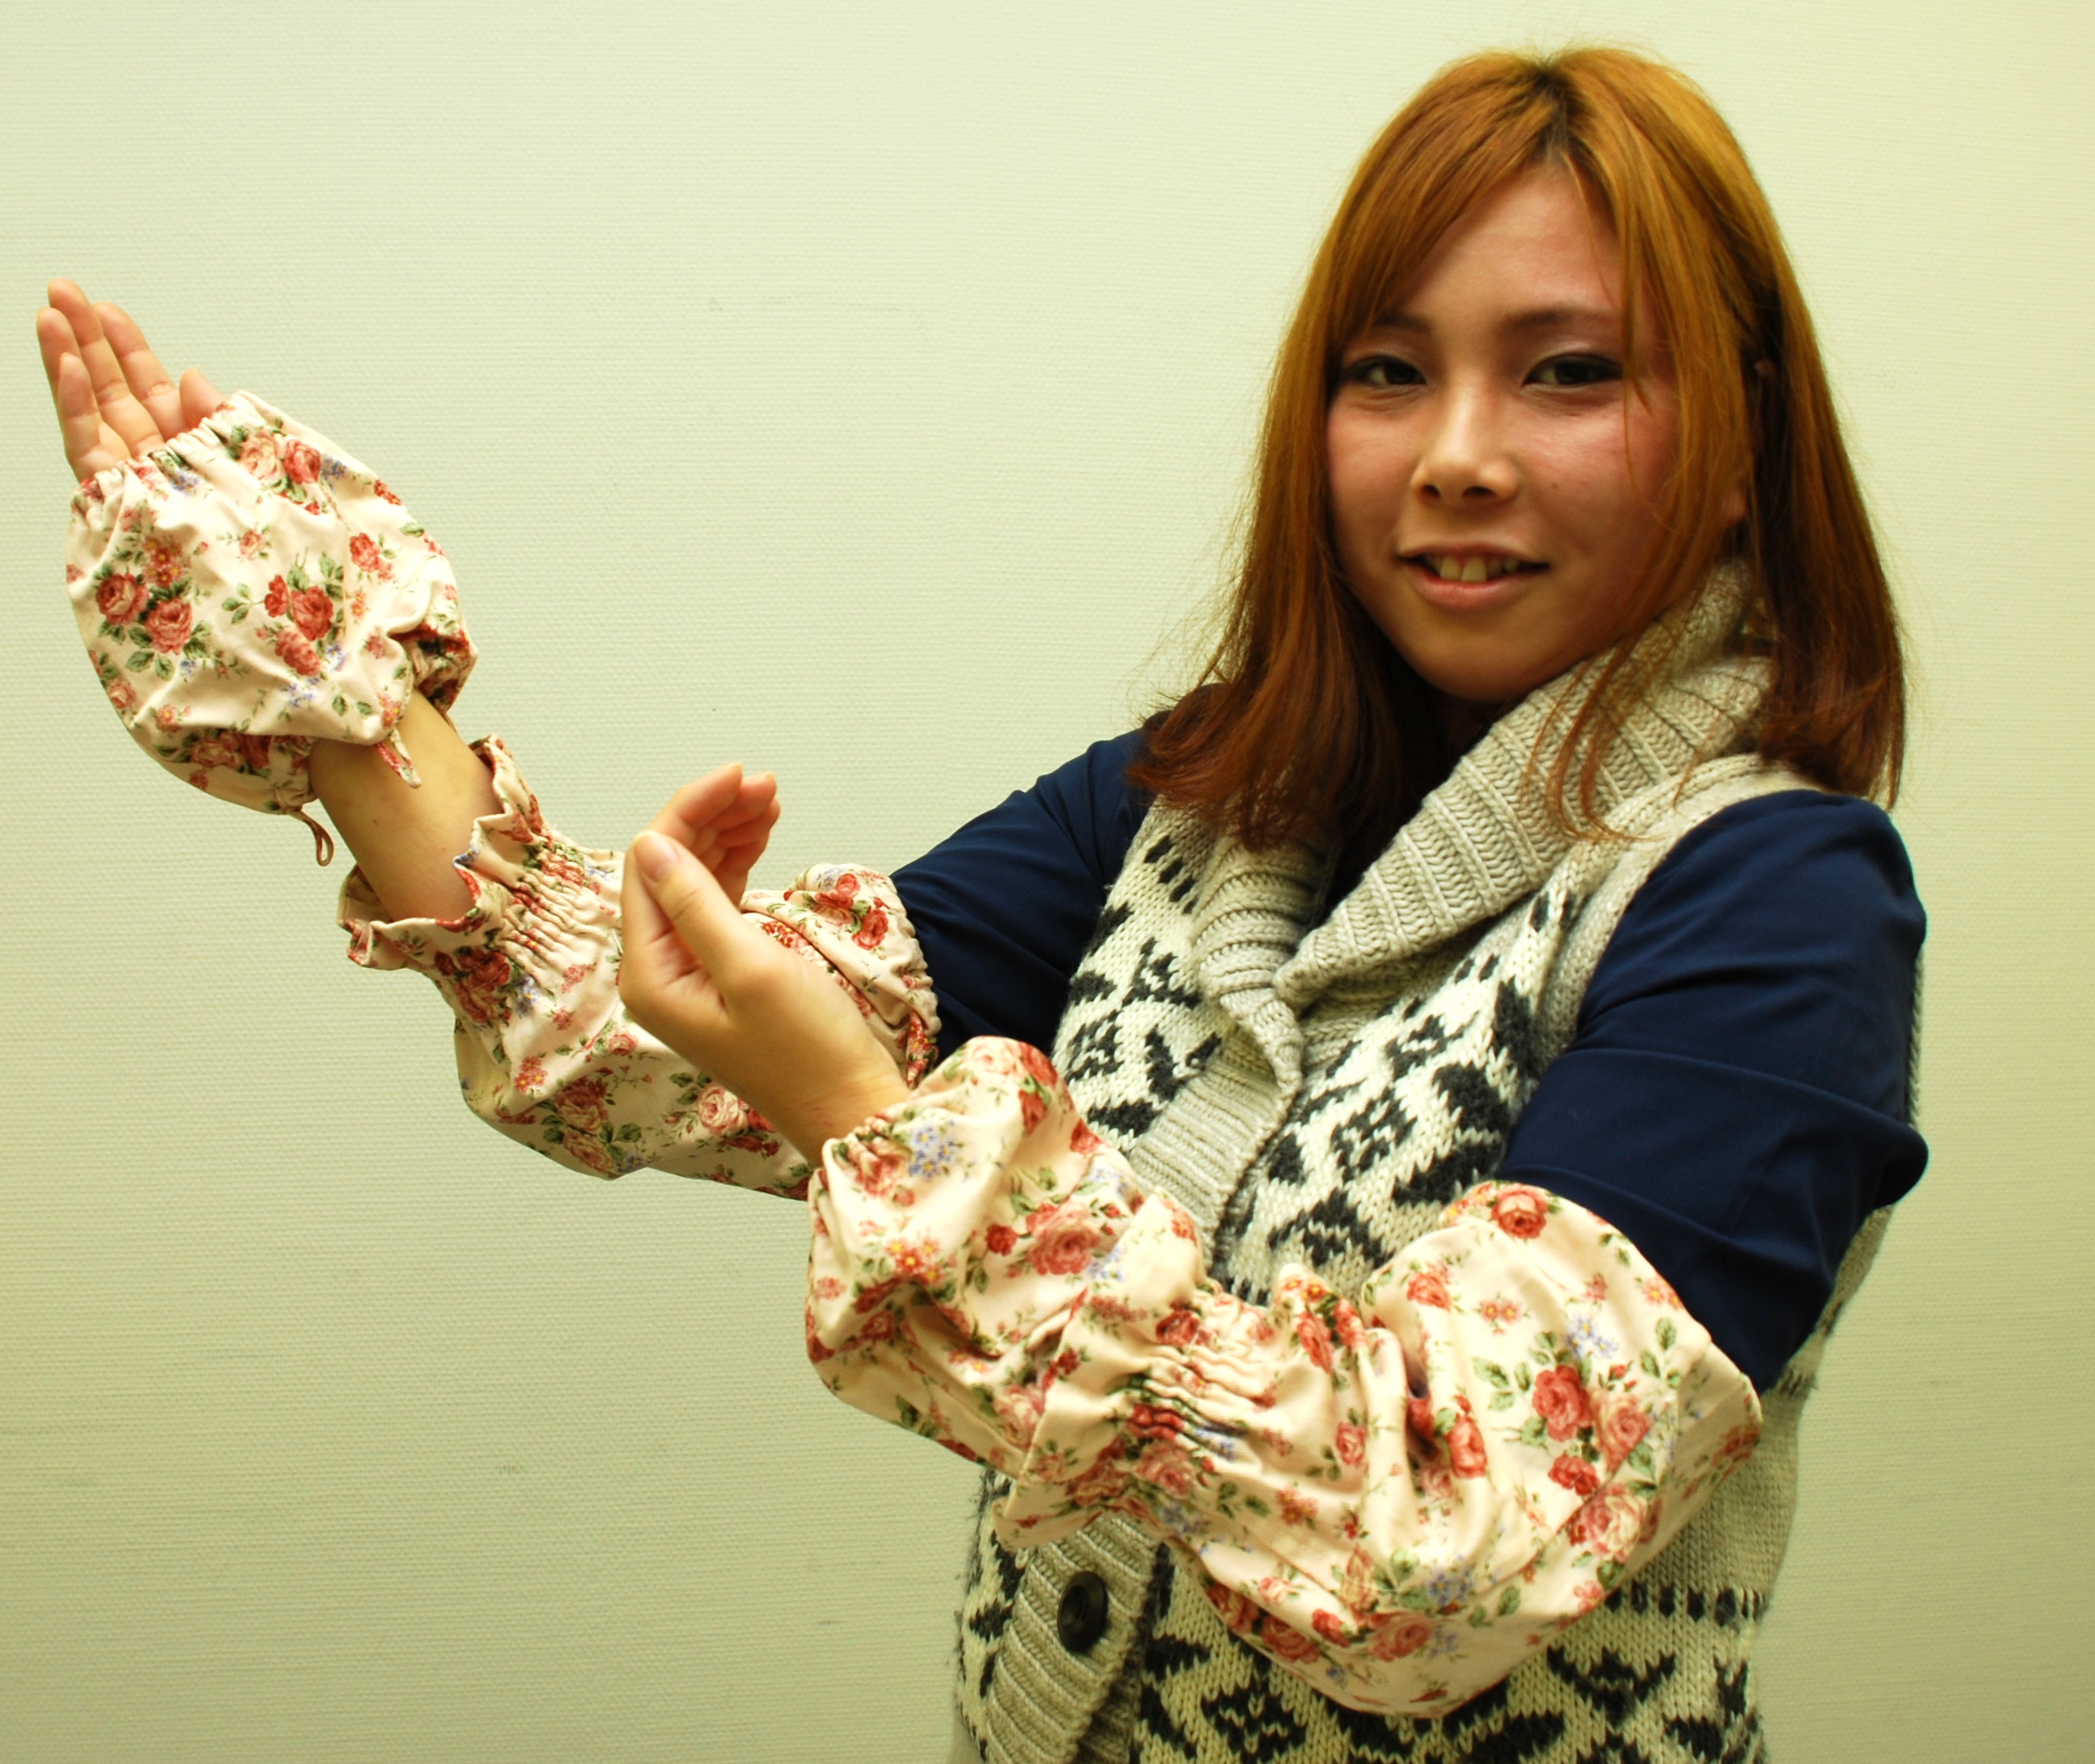
Wakana Sawadaishi shows the adjustable sleeve covers she designed at Wayo Women’s University in Ichikawa, Chiba Prefecture.
Students of Wayo Women’s University in Ichikawa, Chiba Prefecture, have been designing fashionable and practical outfits for farmers, based on their experiences at agricultural workshops and a survey they conducted on farmers.
The university has been holding agricultural workshops for their students since the 2011 school year as a three-year project.
Wakana Sawadaishi, 23, designed sleeve covers with adjustable length to protect the arms and clothing from dirt and debris. The covers, which were displayed at the university’s culture festival, attracted attention of many visitors.
Sawadaishi chose a pink fabric with flower prints, because she wanted a wearer to feel happy whenever she sees her arms during farm work.
Lower parts of the covers are detachable so that their lengths can be adjusted according to the lengths of the sleeves.
Another popular item displayed at the cultural festival was a bandana cap designed by a 21-year-old student Fumi Koseki. From a single piece of bandana cloth, she created a cap which protects the head, face and even the neck from the sun.
The university has been showing on its website how to make the sleeve covers and bandana caps since Thursday, January 9.
How to make adjustable sleeve covers
<MATERIALS>
For sleeve covers: two pieces of 40cm x 40cm fabric
For detachable covers: two pieces of 21cm x 40cm fabric
Elastic tape: roughly 1.8m (as necessary)
Six snap fasteners
Polyester sewing thread No.60
<INSTRUCTIONS>
I. Making sleeve covers
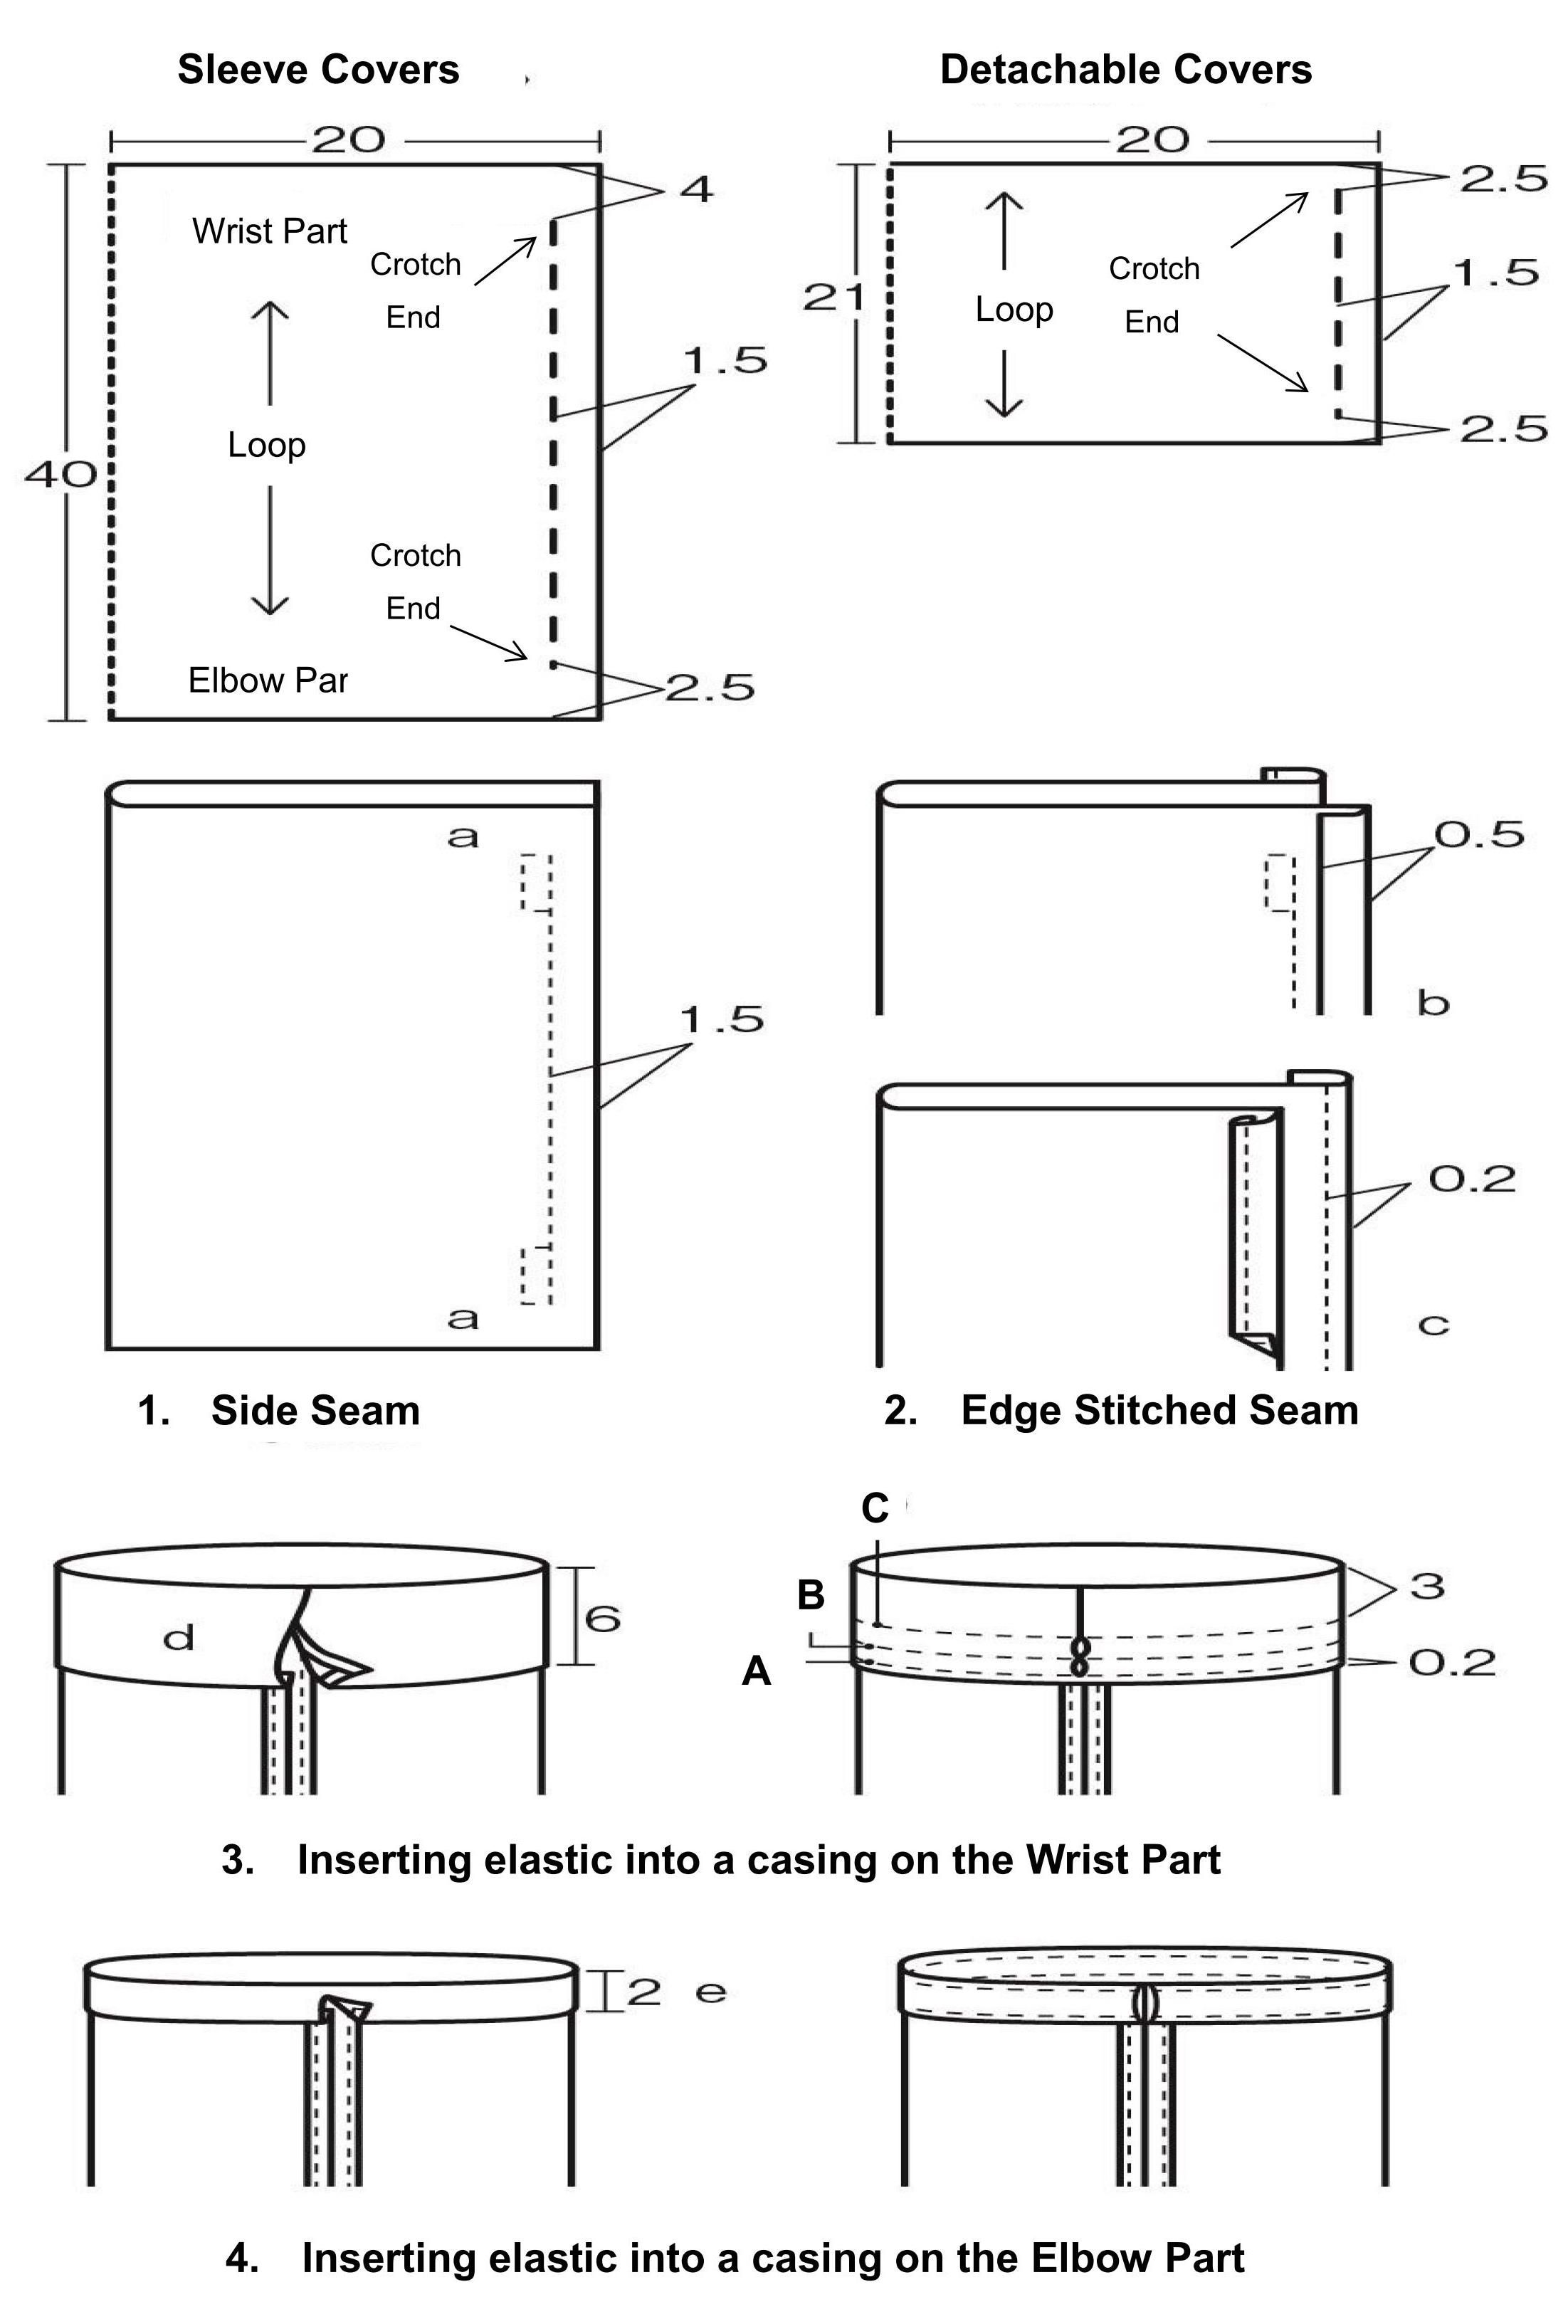 1. Fold the fabric in half with the right sides together, and sew along the sides 1.5cm from the edges (a), overlapping stitches about 1cm at both ends to secure the thread.
2. Open the seam allowances (b), fold them at 0.5cm and sew 0.2cm in from the edges (c).
3. Fold the lower crotch end by 1cm, and again by 6cm (d). Sew 0.2cm in from the folded edge (A), then 3cm from the hem (C) and finally along the line in between the two seam lines (B) to create a casing to insert the elastic tape.
4. Fold the upper crotch end by 1cm, and again by 2cm (e). Sew 0.2cm in from both edges.
II. Making detachable covers
Follow steps 1 and 2, then fold and sew both ends as in 4.
III. Attaching the two covers together
Measure around the casing of a sleeve cover, divide the length into three equal parts (roughly 12cm) and attach three male sides – one with a bump in the center – of snap fasteners at regular intervals on the inside of the cover. Slip the upper part of the detachable cover inside the sleeve cover, press the male sides onto the fabric to mark the positions and sew the female sides on to the detachable cover.
IV. Inserting an elastic tape into the casing
Attach safety pins on both ends of an elastic tape, fasten one of the pins onto one of the openings of the casing to avoid pulling the elastic through the hole. Slide the other pin into the opening and guide the elastic all the way through the casing. Pull the elastic to create gathers and adjust it to avoid making it too tight or loose before cutting it. Unfasten the safety pins, overlap the two ends of the elastic by about 1cm and sew them together using backstitch.
(Jan. 9, 2014)